Designed & Built Full Stack for a Betting Web App
At the start of the Coronavirus quarantine I got interested in actually how hard it would be to build a fully featured web app all on my own. So I dove in head first researching, proto-typing, and learning as much as I could about the process. I chose a very bare bones approach to building this web app because I wanted to learn as much of the fundamentals as I could before I moved onto web development frameworks such as React. So I chose to build this web app in the simplest technology that I could without making it too hard. The tech stack I used was:
The idea was simple. Make a website people could go to, where they could bet on anything they wanted to as long as there was someone else on the other side willing to take up the bet. The implementation of a system like this was a bit more challenging especially for a first time web developer.
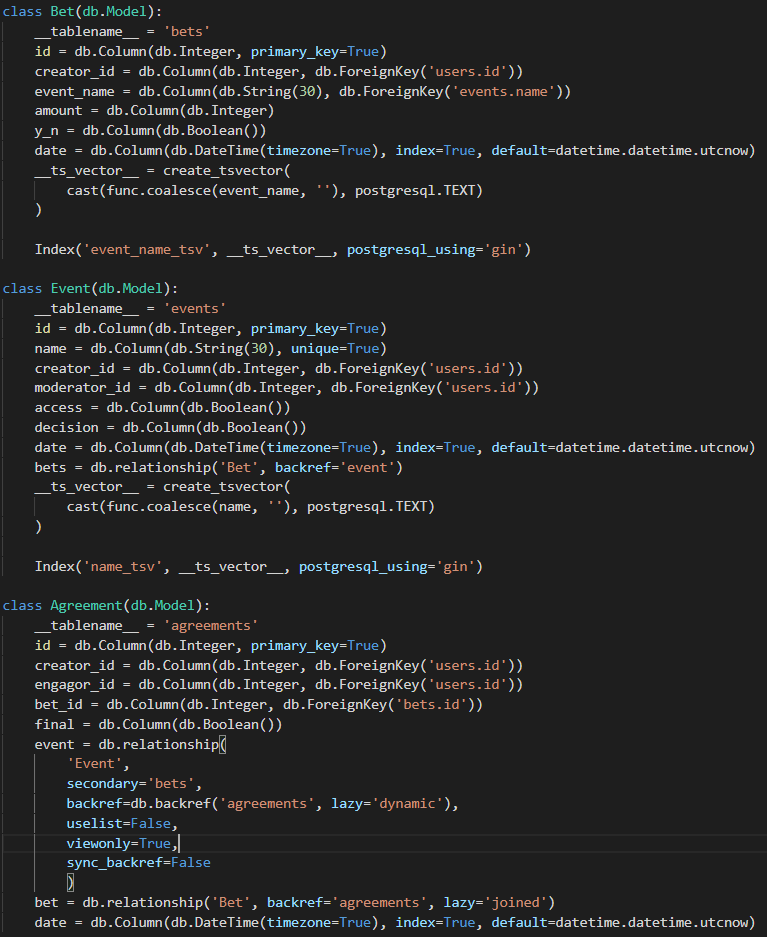
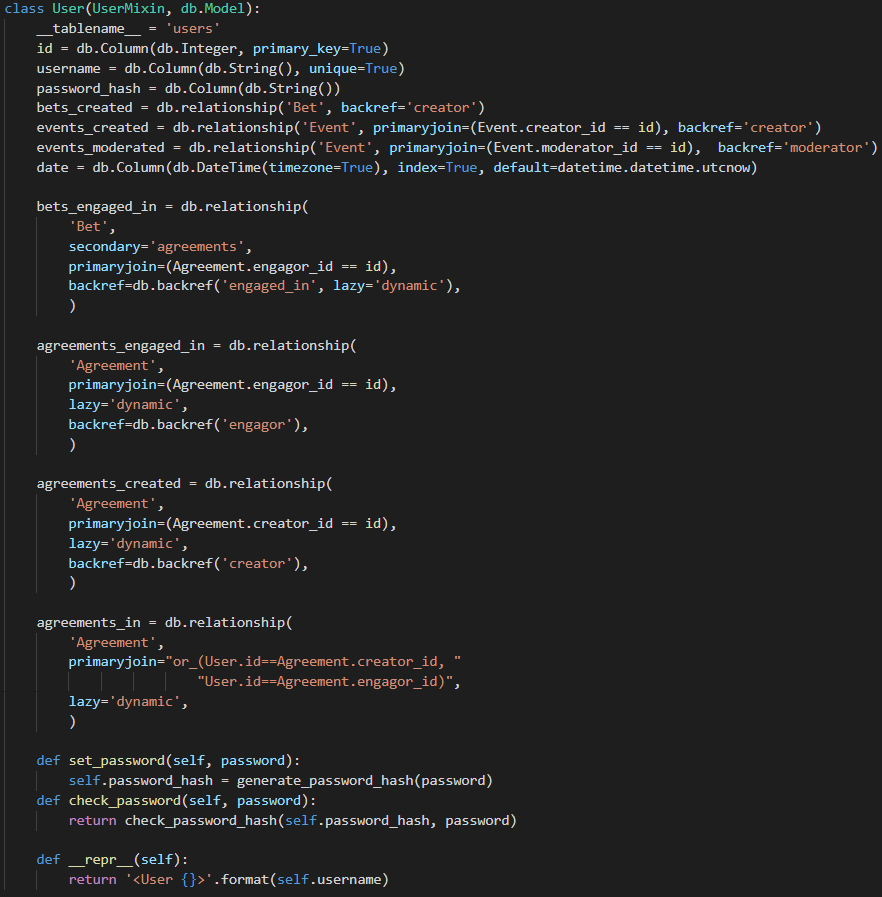
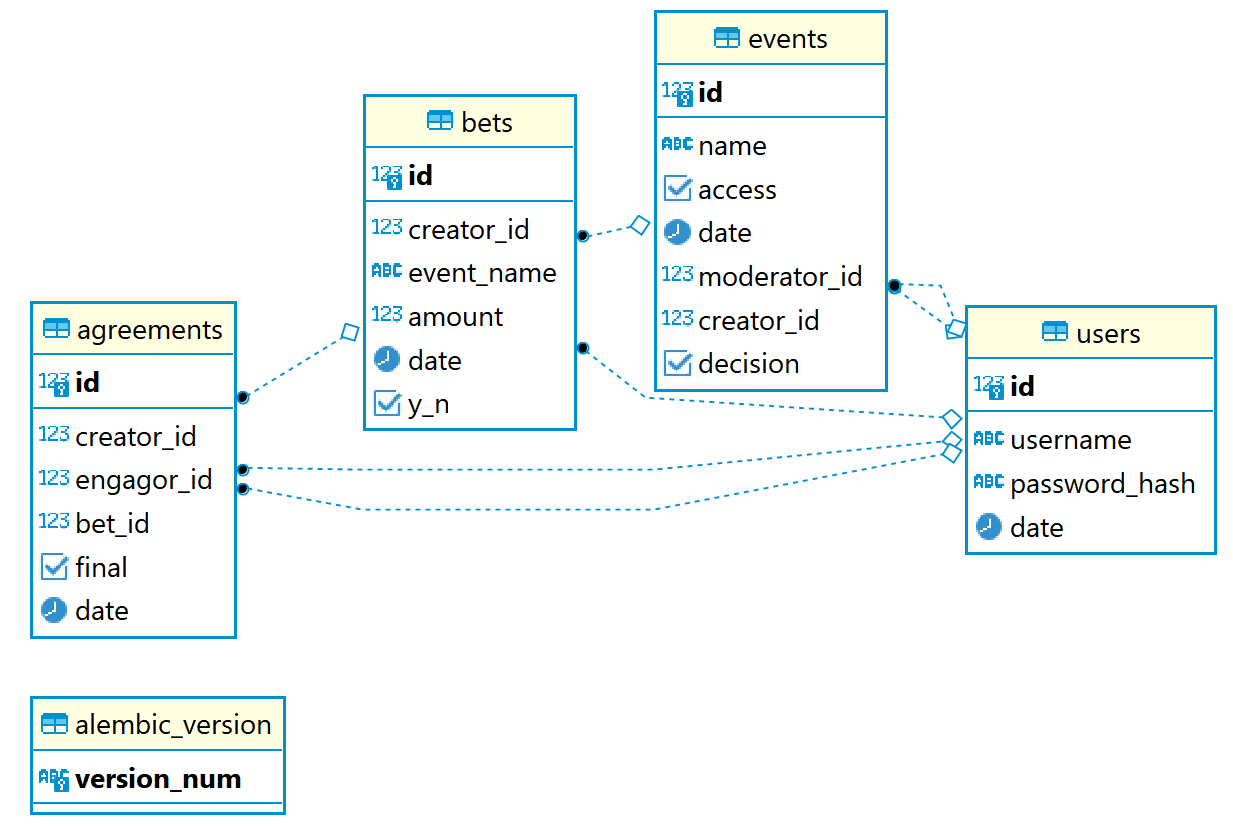
Setting up and figuring out how to use a database effectively was probably the hardest part of this project. I used the SQLAlchemy object-relational mapper (ORM) to create and interact with my PostgresSQL database. This allowed me to work with my database in a "pythonic" way that made it much easier for me to iterate through different versions of database organizations. It also made it easier to create the different many-to-many and many-to-one relationships necessary to make the bet or event specific queries I was making. Lastly using the alembic package made database migrations to new or old database versions seamless.
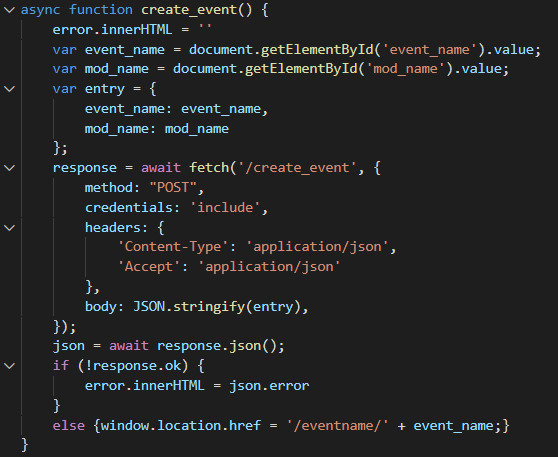
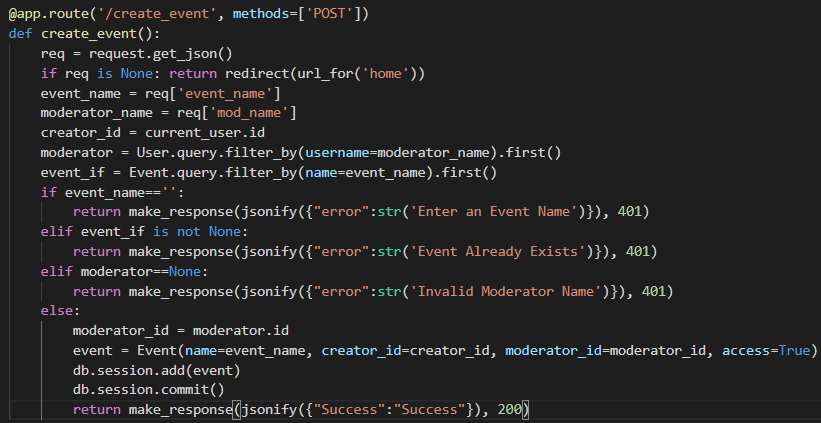
Every function that involved server side operation was mapped to a fetch function that would hit an endpoint on my Flask server. The example below shows how creating an event works. The Create button on the hompepage had its onclick attribute mapped to this asynchronous create_event() function. This function (left image) uses the fetch api to send the inputted values for event name and moderator name to the /create_event endpoint with a POST request. Then on the server (right image) we query the user and event objects/rows corresponding to the data sent, check to make sure that the inputs are valid, and then create the event in the database. If the input are not valid I send back an error that can be displayed right on the page and if the event is created I redirect them to the newly created event page for that event.
And this is how a page on my website is shown as opposed to a server side function. This is the code for a user's page that acts as the control center for all of your bets if you are viewing your own user page. It immediately queries all of the data necessary to display the user's page from the database. Then it checks to see if the user's page you are navigating to is the same user that is currently logged in. If it is then it sets the owner boolean variable to True and if it isn't it sets it to False. Based on this variable the html that is served either includes or excludes the ability to agree to or reject another person's acceptance of a bet.

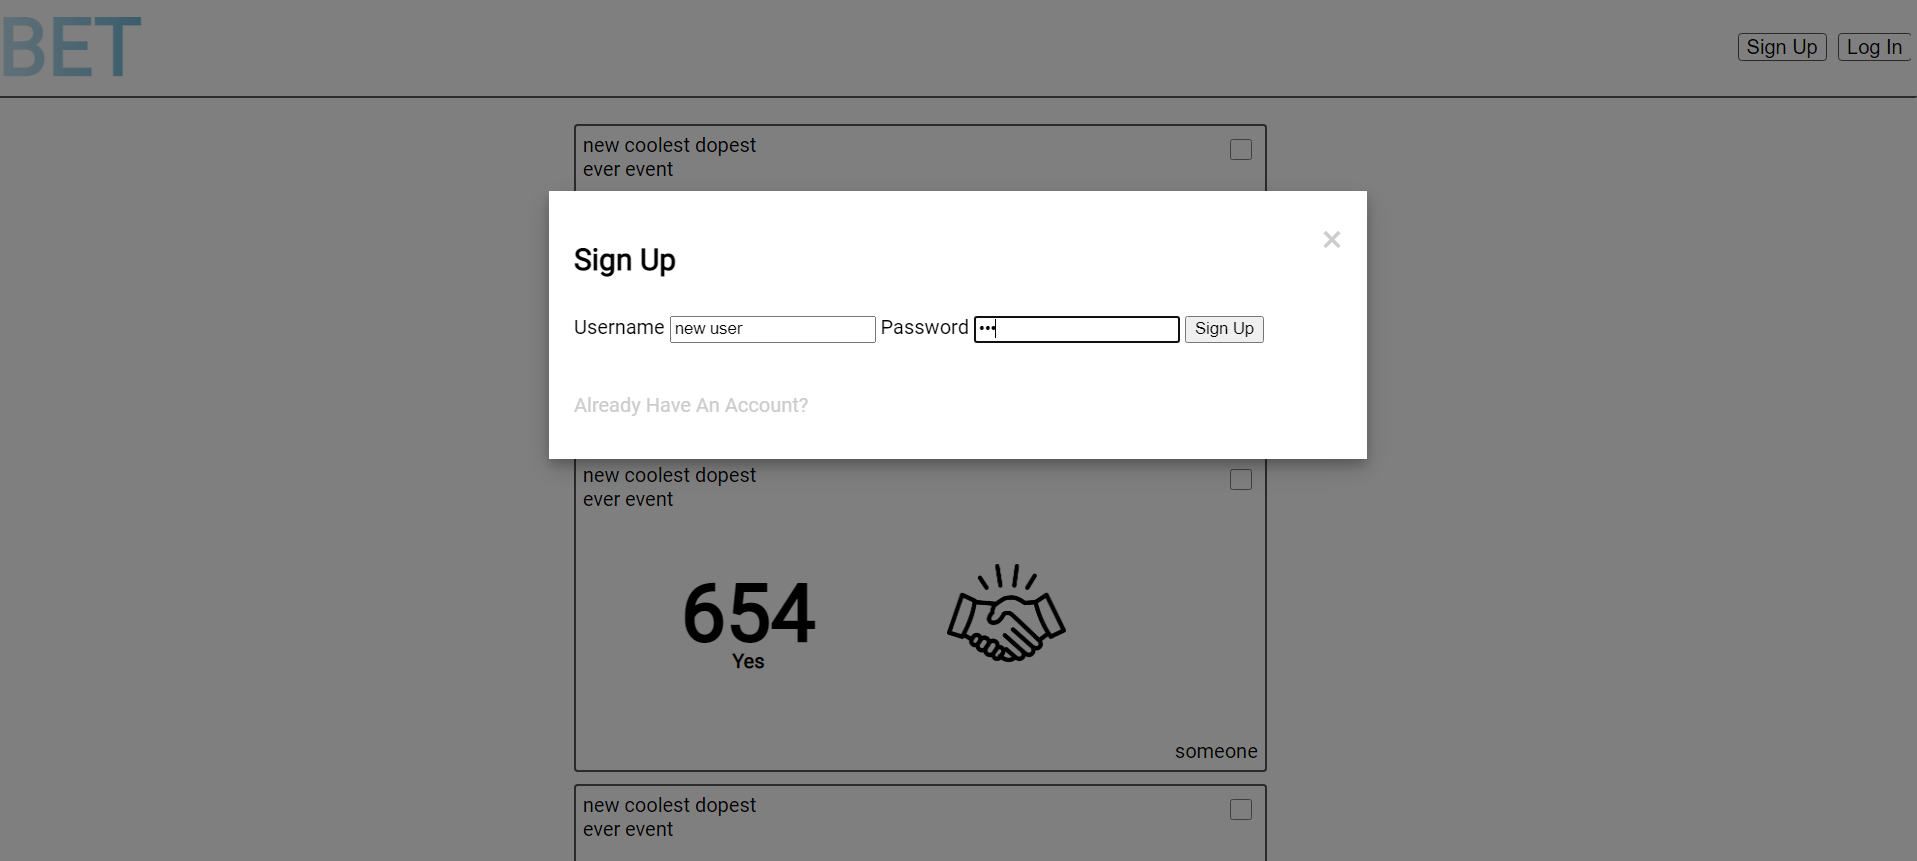
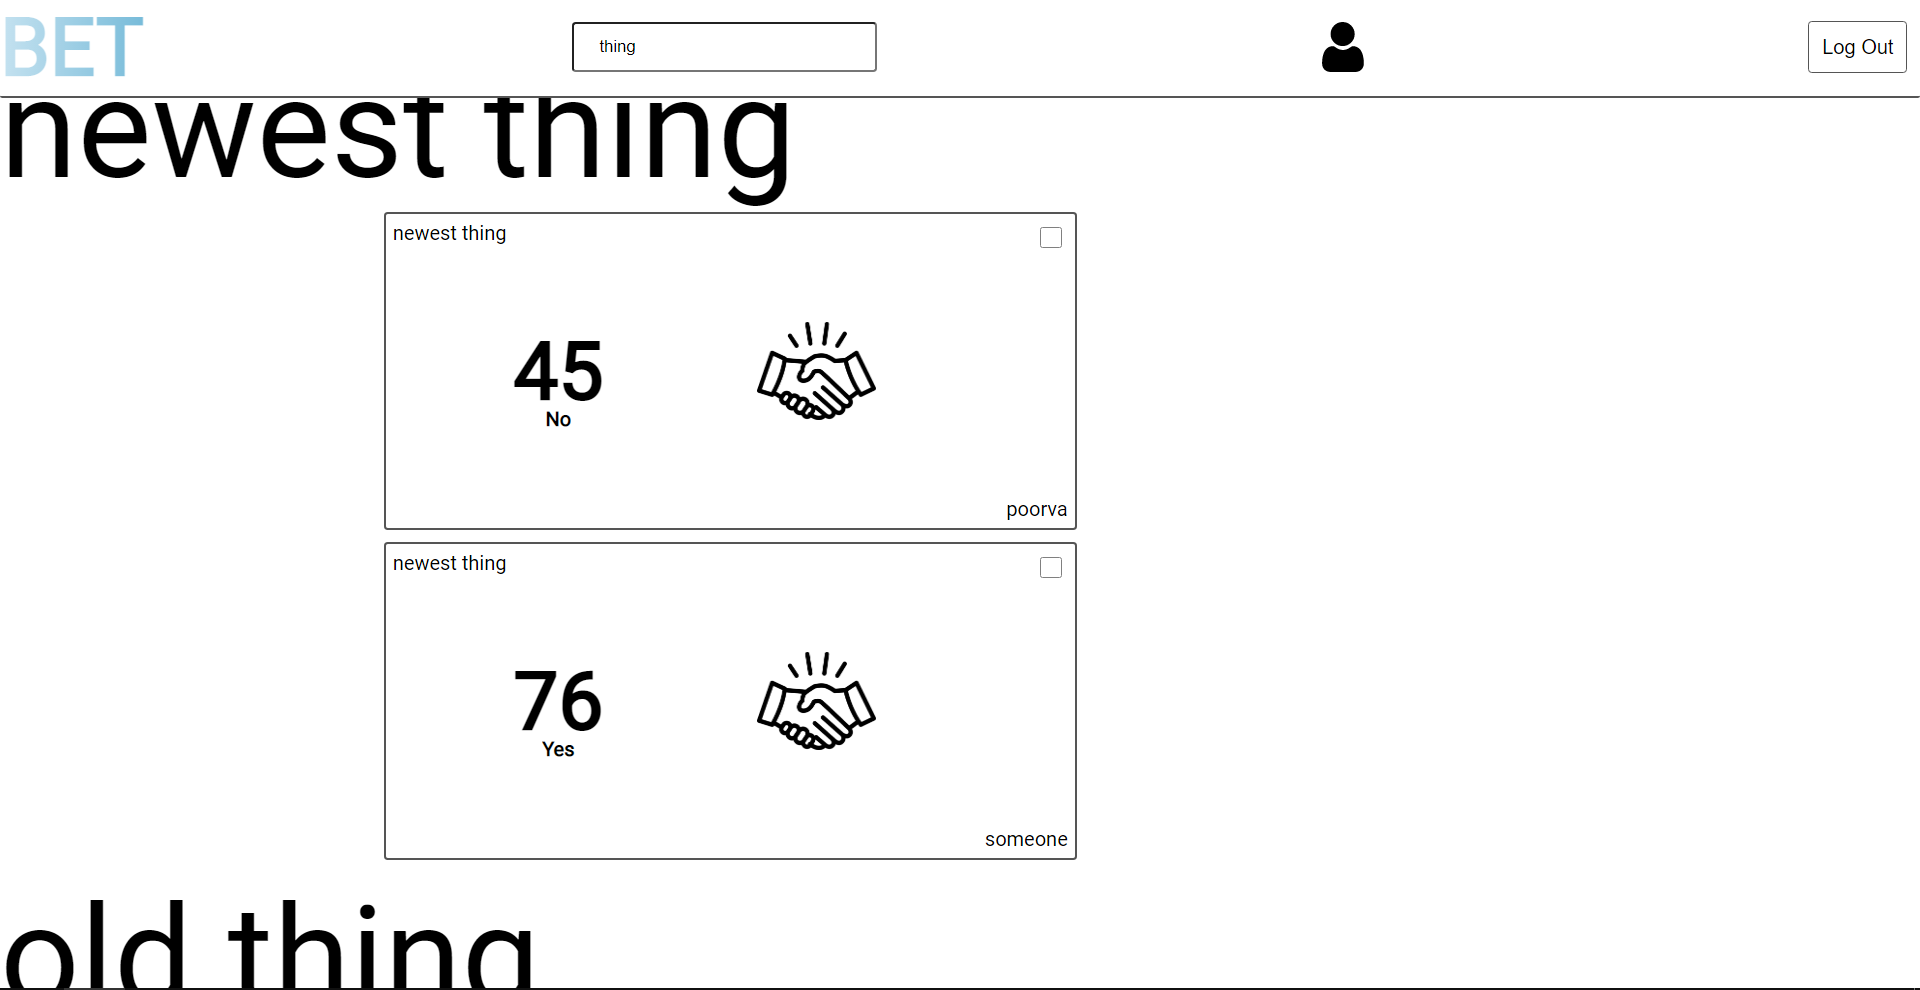
As soon as you get onto the site you will see the homepage which has a list of the latest bets made. However, in order to interact with any of these bets or make any of your own you have to either Log In or Sign Up.
Once you are logged in you can create an event on the hompepage and input a user that should be the moderator for that event that decides which way the event is decided.
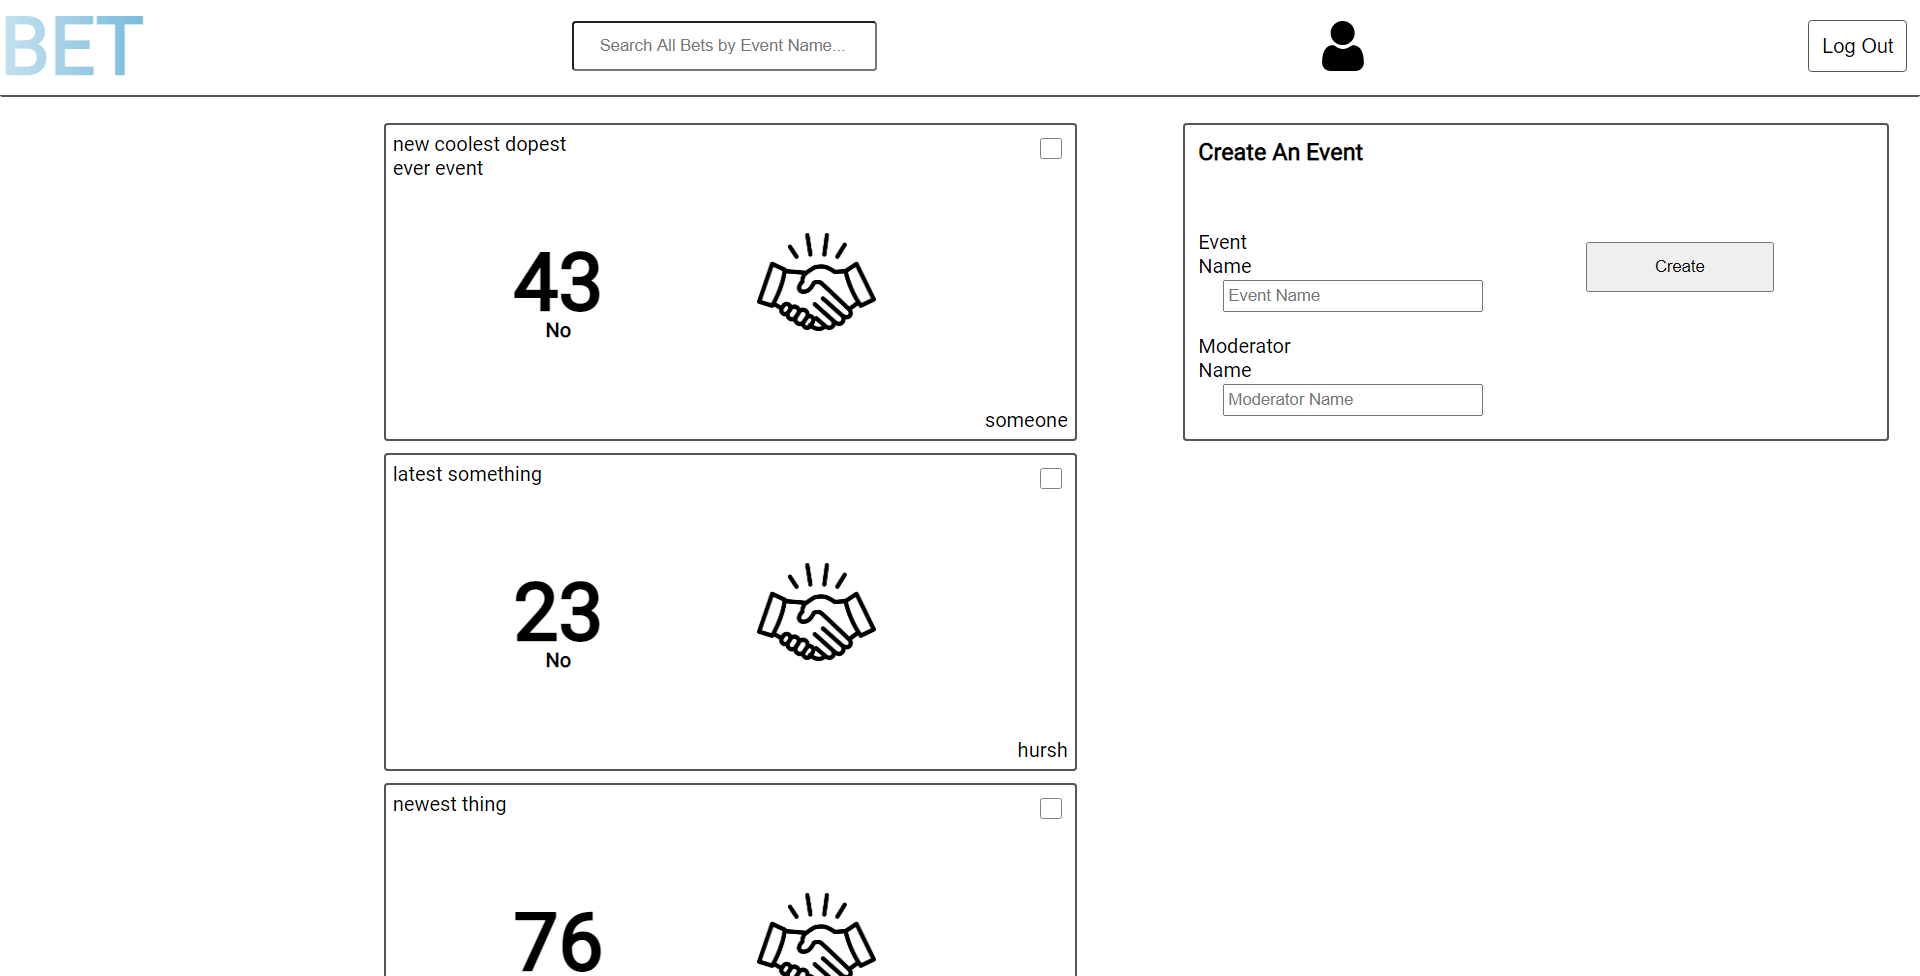
I also implemented the ability to search for bets based on the name of the event.
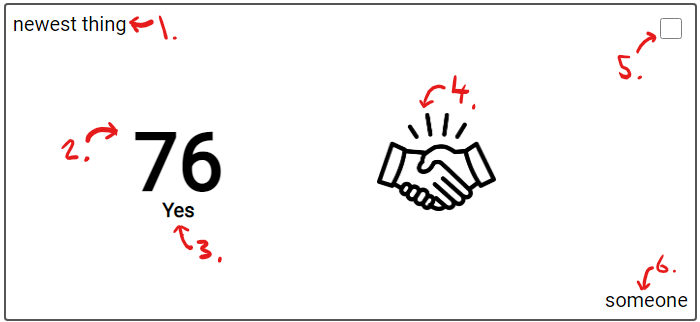
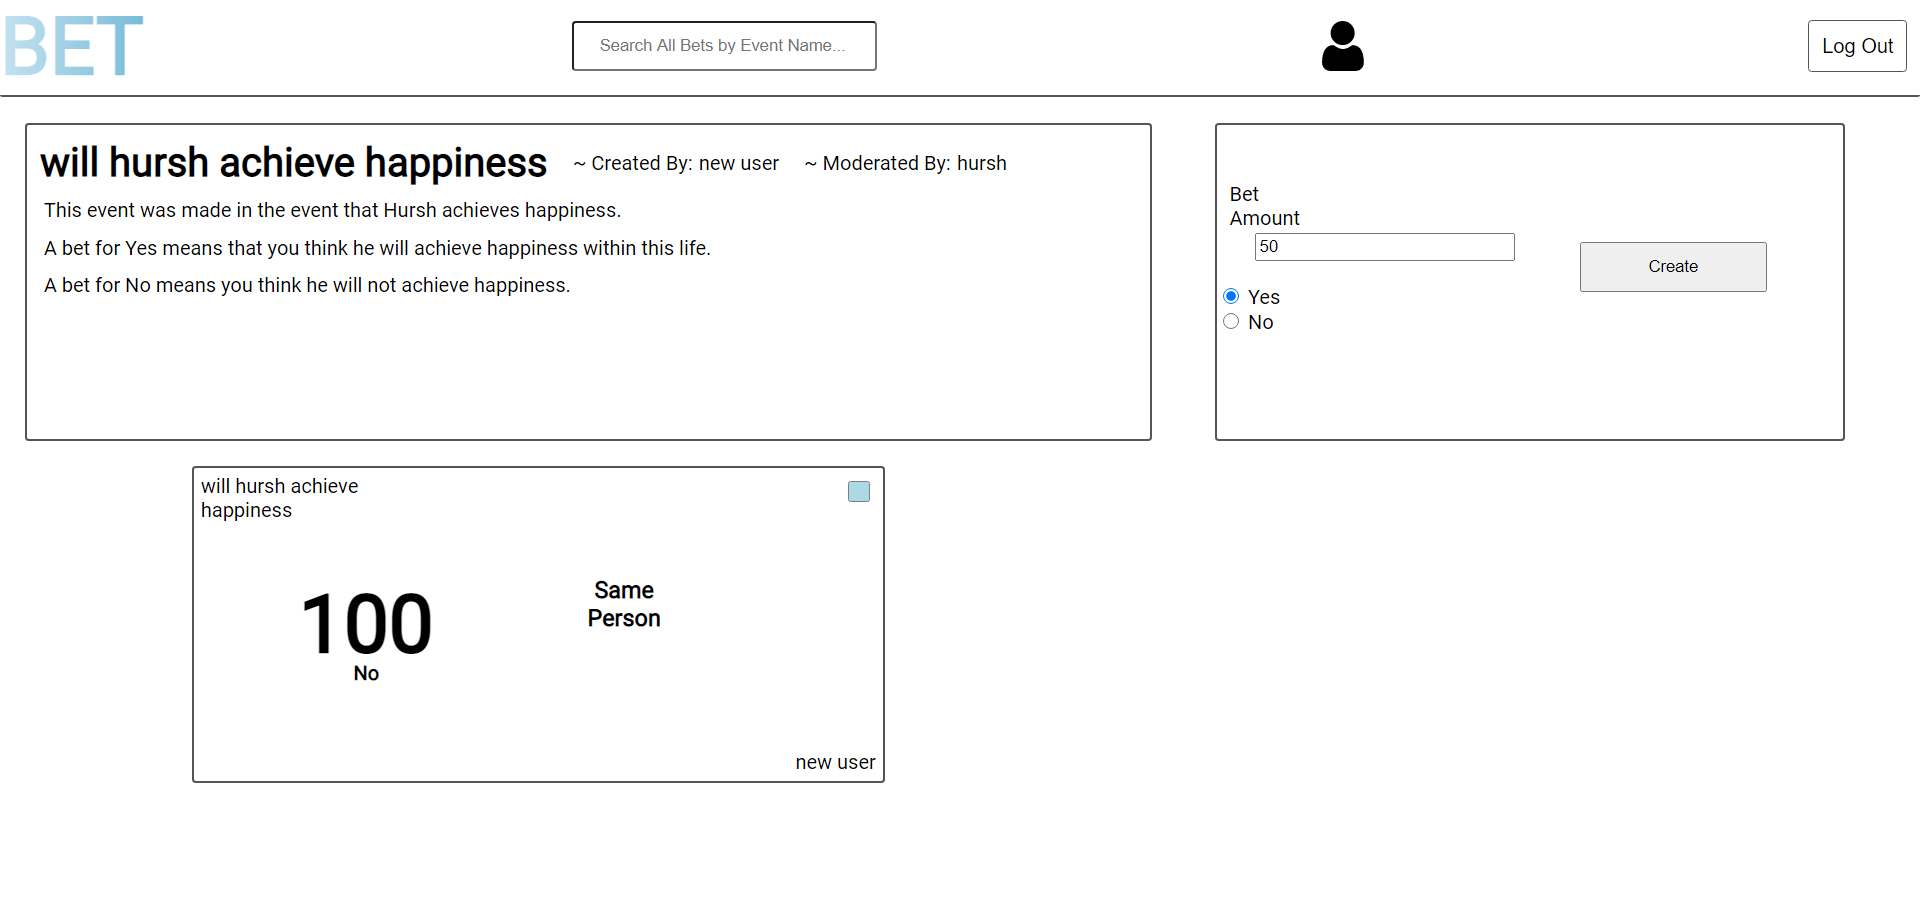
This is an event page that you can reach by searching for the name of the event or clicking the event name in a bet card. On this page you can get information on the event like who created it and who is moderating it. You also get the description of the event and the description for what choosing Yes or No means in terms of this event.
You also get a list of bets that have already been made under this event that you could take the other side of. Lastly you can make your own bet. You get to choose how much you want to bet and which side of the event you want to take and just click Create!
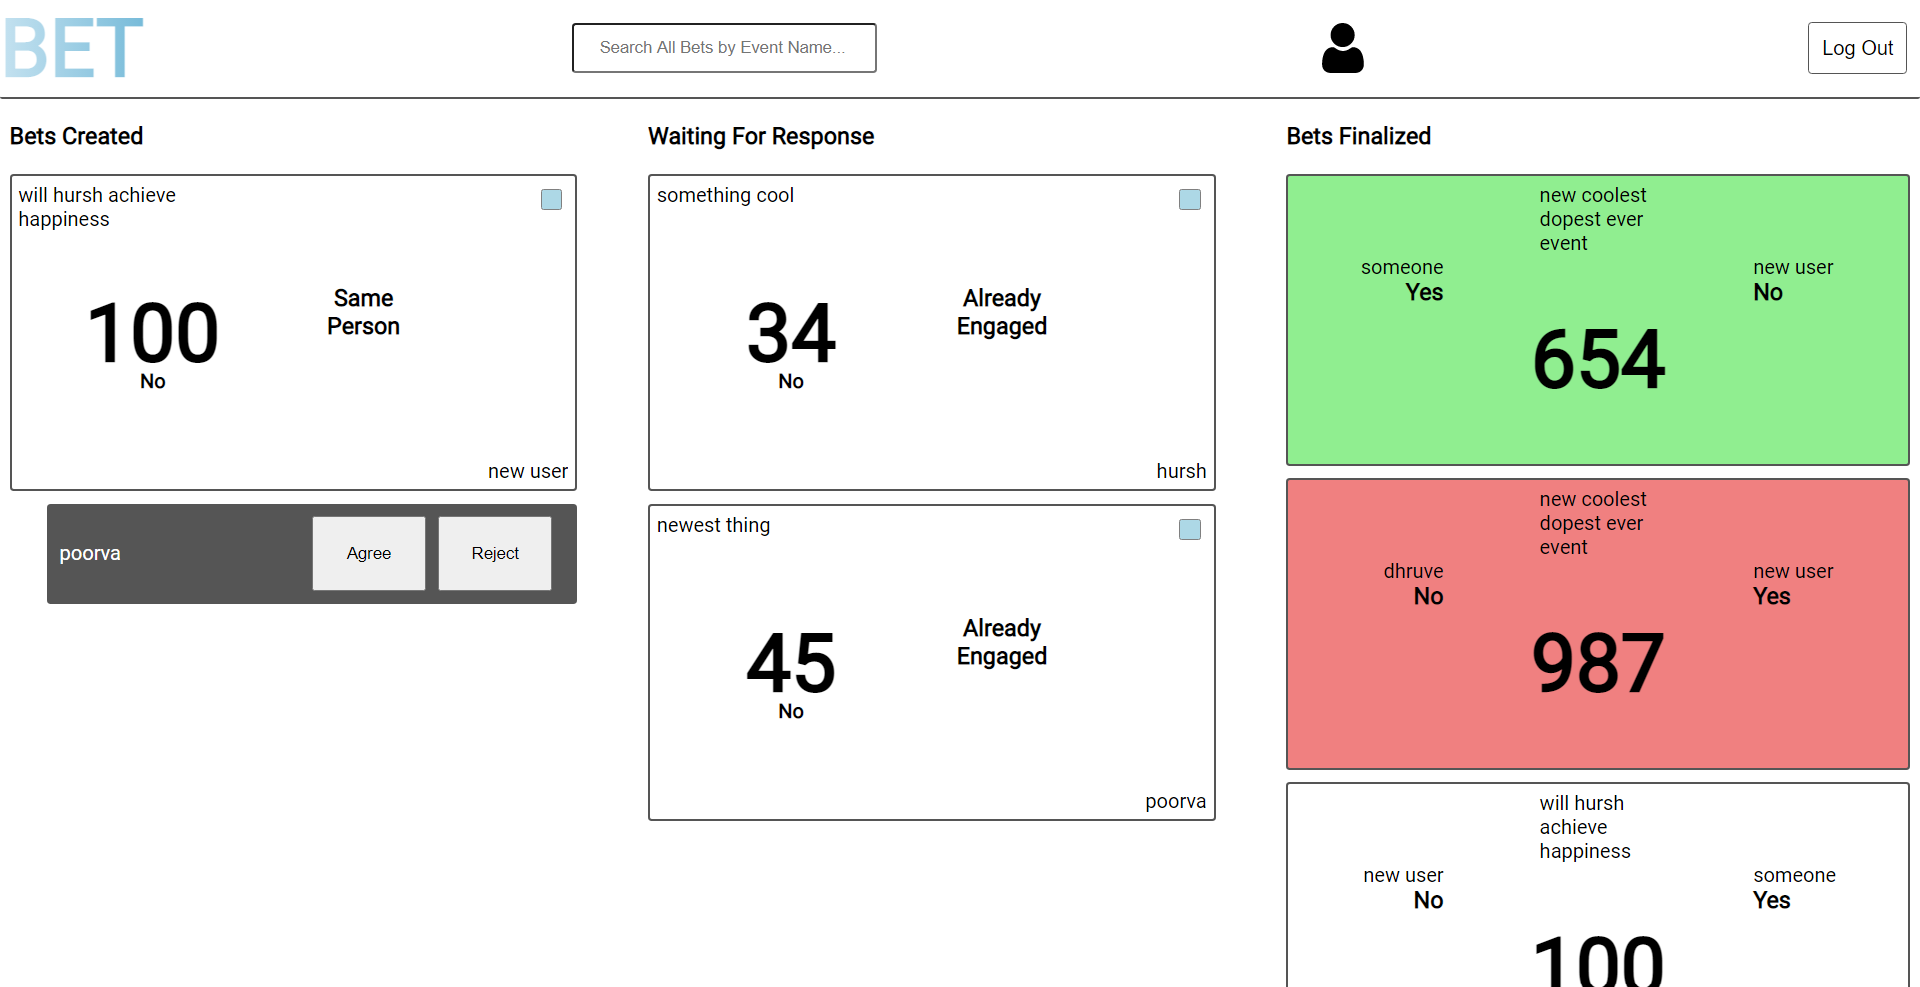
Lastly and most importantly is the user page for each user which acts as a sort of control center for all the bets that user is involved in. Each of the three sections are individually scrollable:
You only have the option to agree to or reject people taking on the other side of a bet you created if you are on your own user's page. Everything else on this page is pretty self explanatory. Once the event is decided upon by the moderator to be either yes or no, if you were correct then that bet under Finalized Bets will turn green or else if you were wrong it will turn red.
The arduous journey that I went through to learn the technology as I was creating using the technology was well worth it in the end. I learned a lot about the process of web development as well as about myself. In hindsight an idea of this complexity probably shouldn't have been my first step into this world but I came out the other side better from it. This project has built a lot of confidence within myself that if I have an idea I can actually manifest that idea in the real world in a way that other people can interact with it. For my next project I will be going up the tech stack to a more fully featured web development framework to ease the development process and additionally I will try to pursue building a less complex idea. In this way I can focus on developing my skills in creating go-to-market strategies and growing the product rather than the development process.